breakfast

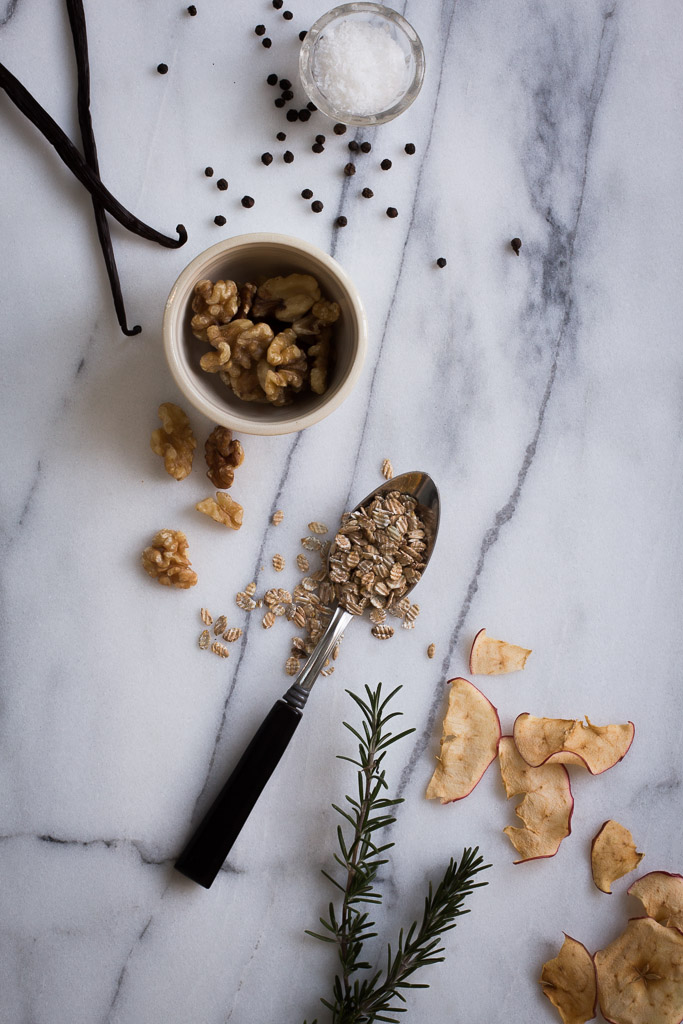
apple-rosemary granola

Apple-Rosemary Granola // Milly's Kitchen

We’re off to a slow start around here.

In the holiday preparedness department, that is. We don’t have a Christmas tree. We haven’t hung a festive wreath on our door. We have drunk zero mugs of peppermint hot chocolate with little marshmallows on top.  

It only just hit me today is December 9th and if I intend to do any wreath-making or tree-decorating or delicious-holiday-beverage-drinking, I had better get it in gear. So my mind has finally turned towards Christmas. This morning I tracked down my favorite holiday cookie recipe (lebkuchen!). Now I’m dreaming of filling the house with the smell of candied orange peel and cardamom. And I can’t wait to pick out just the right tree. After all these Christmases, I still experience a childlike delight each morning as I tiptoe in to sit quietly by the twinkling lights and breathe in the piney smell of the forest.

Apple-Rosemary Granola // Milly's Kitchen

Alongside the sharing of meals, the making and giving of homemade gifts is the heart of the season for me. I’ve offered many over the years: rosemary shortbreads and coconut macaroons and spicy cheddar cheese straws and carrot-cardamom jam. One year, I thought my poor hands were going to be forever useless from piping sheet pan after sheet pan of peanut butter meringues. Another year, I nearly bankrupted myself making a mountain of pistachio-apricot bark with Valrhona dark chocolate and Theo cacao nibs.  

Apple-Rosemary Granola // Milly's Kitchen

But I’ve learned my lesson. And with each passing holiday season I’ve grown a bit wiser in my holiday goodie-giving. So now, one of my go-to gifts is homemade granola. It’s simple to make. It stores and ships marvelously well. It’s inexpensive (at least compared to Valrhona dark chocolate bark!). And everyone loves good granola.

This year's flavor is apple-rosemary. I have yet to meet a homemade granola I didn’t like, but the subtle sweetness and savory notes in this version are especially pleasing to me. The sweet-tart apple brightens the earthy walnuts and the rosemary adds a slight herbaceous note. The warm spices make this granola perfect for the holidays.

Apple-Rosemary Granola // Milly's Kitchen

There are infinite possibilities for improvising here: pear in place of the apple, sesame instead of flax, almonds in lieu of walnuts. I hope you’ll make this recipe your own. I also highly recommend baking up an extra batch so you have some for your own cupboard. It is delicious on top of creamy yogurt with a sliced pear or apple. If you’re feeling especially festive, swirl in a few spoonfuls of chestnut jam and elevate the whole affair to something brunch-worthy.

Apple-Rosemary Granola // Milly's Kitchen

I hope you’ll join me and indulge fully in the holiday spirit. Hang a wreath. Drink some cocoa. Hell, splash a little bourbon in there--it’s the holidays! Bake up a jar of granola. And enjoy the beauty of the season.


Apple-Rosemary Granola // Milly's Kitchen

Apple- Rosemary Granola

  • 1 recipe wet ingredients (see below)
  • 1 vanilla bean
  • 4 cups rolled oats
  • 1 cup rye flakes (also known as rolled rye. If you can't find rye flakes, just use all rolled oats)
  • 2 cups raw walnut pieces
  • 1 cup flax seeds
  • 1 cup raw shelled sunflower seeds
  • ¾ cup light brown sugar
  • 1 teaspoon ground cinnamon
  • 1 teaspoon freshly-ground black pepper
  • 1 tablespoon dried rosemary
  • 2 tablespoons kosher salt

Wet ingredients:

  • ¾ cup unsweetened applesauce

  • 6 tablespoons maple syrup (preferably grade B, which is darker and more delicious)

  • ¼ cup honey (If you can get your hands on buckwheat or chestnut honey, it will make your granola extra special)

  • ¼ cup olive oil

  • 3-4 cups dried apple slices (about 3 medium apples if you are drying your own)

If you are drying your own apples, position racks in the upper and lower thirds of the oven and preheat to 200° F. Slice the apple very thinly--using a mandolin helps for this. I don’t bother to core the apple as the seeds just fall out as you slice. Place the apple slices on a parchment lined sheet pan and bake for 1 hour. Turn the apple slices over and rotate the pans. Bake for another hour. Test the slices to see if they are crisp. If so, remove them from the oven and let the apples cool completely before removing them from the pan. If not, bake the apple slices for an additional 15-20 minutes, or until completely dry and crisp. These will keep for several weeks in an airtight container.

To bake the granola, preheat the oven to 300° F. 

Split the vanilla bean in half lengthwise and scrape out the seeds with a paring knife. Place the sugar in a small bowl and add the vanilla seeds. Using your fingers, rub the seeds into the sugar; this will keep the vanilla from clumping together in the granola.

Place the vanilla sugar in a large bowl. Add all the dry ingredients (not the dried apple slices) and stir to combine thoroughly.

Combine the wet ingredients in a medium bowl and whisk well to combine. Pour the wet ingredients over the dry ingredients and stir until all the dry ingredients have been coated.

Divide the granola between two parchment-lined sheet pans. Spread the granola out and place the pans in the oven. Bake for 45 minutes, rotating the pans and stirring the granola every 10 minutes or so. After 45 minutes the granola will be golden but not completely dry. Don’t worry about that, it will crisp up as it sits. Place the sheet pans on wire cooling racks and give the granola a final stir so it doesn’t dry into big clumps. When the granola is completely cool, stir in the dried apple slices. Transfer it to an airtight container (I like a big mason jar) and store in a cool dry place. Tightly covered, the granola will keep for several weeks.

Makes about 10 cups

Apple-Rosemary Granola // Milly's Kitchen

vanilla-chestnut jam

Vanilla-Chestnut Jam // Milly's Kitchen

I recently found myself in Paris, the leader of a band of hungry and adventurous travelers. We walked all over the city sampling its many specialties: washed-rind cheeses, velvety pâtés and terrines, eclairs heavy with with hazelnut pastry cream and lacquered in dark chocolate. Almost every meal was sublime. How they pack so much amazing food into one city, I have no idea.

But the very best thing I ate on my trip was a pot of plain yogurt with vanilla-flecked chestnut jam.

Vanilla-Chestnut Jam // Milly's Kitchen

Standing in the vast yogurt aisle of the Monoprix off the Place de la République (French people apparently love yogurt), I was drawn to a little glass jar with a gold foil lid, which made it stand out from its plastic compatriots. I tossed it into my basket alongside a package of my favorite country ham, a baguette and a box of fennel tea.

When I opened that little jar of yogurt for breakfast the next day, it was a revelation. The yogurt itself was thick, impossibly creamy and only subtly tart. The layer of chestnut jam at the bottom had a nutty, buttery sweetness reminiscent of hazelnuts and walnuts. It tasted like honey and the forest and cognac and vanilla all at the same time.

I ate a pot of that yogurt almost every day for the next three and a half weeks.  

I brewed myself cups of strong coffee and ate spoonfuls of chestnut yogurt while watching the sunlight creep up over the rooftops of Paris.

Vanilla-Chestnut Jam // Milly's Kitchen

The minor crisis I had upon returning home to a cold and rainy Seattle was compounded by the total lack of chestnut yogurt. I fell into a serious funk. I felt pretty sure there was only one thing that could remedy my dark mood. And so I began researching recipes for chest jam.

I did not grow up eating chestnuts. My exposure to them was actually non-existent before our fateful meeting in the yogurt aisle. Basically, I didn’t know the first thing about chestnuts. I contemplated making jam from the vacuum-sealed packages of chestnuts I’d seen at my grocery store in order to sidestep the intimidating peeling process. But after researching French recipes for confiture de marrons, I decided only fresh chestnuts would do and set about learning as much about them and this rustic jam as I could. 

One of the things I learned is that peeling fresh chestnuts is not not the easiest thing in the world. In true French fashion, chestnuts are notoriously aloof. They fall from the tree in a prickly green armor. Once coaxed from their jackets, they reveal a shiny, hard shell. Underneath, they are secured in a layer of papery skin.

Some are put off by the work it takes to coax them from their layers. Surprisingly, this turned out to be half the pleasure for me.

I loved the rhythm of peeling away the smooth shells. The repetitiveness of the task gave me space for my mind to wander and filled my kitchen with smell of roasting chestnuts. Peeling chestnuts, I discovered, is an excellent way to carve out a moment to be alone with your thoughts. Or listen to your favorite podcast. Or have a meandering conversation with a good friend. And once you have the chestnuts out of their shells, making the jam is a cinch.

Vanilla-Chestnut Jam // Milly's Kitchen

And it's definitely worth the effort.  

A spoonful of the finished jam, still warm from the pot, tastes of sweet, earthy chestnuts mingling with the floral and woodsy notes of the vanilla. You will want to spread it on thick slices of country bread accompanied with a cup of black coffee. Or fold it into whipped cream and use it as a layer in a dark chocolate cake. For the holidays, I might thin it with a little bourbon and use as a glaze for roast turkey or duck. Or I might spoon it over vanilla ice cream with rosemary and caramelized pears.  

But before any of that, I’ll be stirring it into creamy homemade yogurt and dreaming of lazy mornings watching the sun rise over Paris.


Vanilla-Chestnut Jam

*Notes: I prefer to make this jam with fresh chestnuts.  I think the flavor is deeper and more complex.  But you can absolutely make a very good version with vacuum-packed or canned nuts if you prefer.  You will need to reduce the cook time accordingly, since packaged chestnuts are usually fully cooked.

- If working with fresh nuts, American-Chinese hybrid or Chinese chestnuts (which are commonly grown in the US) are easier to peel than their Japanese and European cousins.  I tested many techniques for peeling fresh chestnuts and found the steam-roast method outlined here to be the best by far. When peeling, I only roast about a cup of chestnuts at a time; I found them quite easy to peel when hot, but when they cooled down even a bit, it was much harder to get their inner skins off.  

- Feel free to peel the chestnuts and then store in an airtight container in the refrigerator for up to 5 days before making the jam.

Vanilla-Chestnut Jam // Milly's Kitchen
Vanilla-Chestnut Jam<
Vanilla-Chestnut Jam

  • 2 ¾ lbs. (1.25kg) unshelled chestnuts (You only need 2 ½ lbs. for the recipe. I’ve added an extra ¼ lb. as a margin of error for the peeling process and in case you get a few bad nuts.)
  • 1 ¾ lbs. (780g) sugar
  • 1 vanilla bean
  • 1 teaspoon lemon juice
  • Sterilized jam jars (6 cups total capacity)

To peel the chestnuts:
Preheat the oven to 400°F. Place a rimmed sheet pan in the oven to preheat as well.

Place a chestnut flat-side-down on a cutting board. Use a serrated knife to cut a deep “x” on the rounded side of the nut. (I find using a serrated bread knife to be the safest and easiest way to cut the chestnuts.) Repeat with remaining nuts.

Bring a small saucepan of water to the boil. While the water is coming to the boil, place a kitchen towel inside a medium bowl.

When the water is boiling, place a large handful of chestnuts (about 1 cup) in the pot. Boil for 2 minutes. Remove the nuts with a slotted spoon or spider and transfer them to the heated sheet pan. The boiling allows water to get beneath the inner membrane and the hot oven creates steam that helps lift the membrane from the chestnut. Roast for 7 minutes.  

Tip the nuts from the sheet pan into the towel-lined bowl and bring the corners of the towel together to keep the nuts warm. Return the sheet pan to the oven.  

Note: You might want to wear latex or rubber gloves for the next step if your fingers are sensitive. 

Remove one of the nuts from the bowl, taking care to close the towel and keep the rest of the chestnuts warm. The corners of the “x” will have peeled back to reveal the skin beneath. Using both hands, pinch the four corners of the shell together to loosen and crack the skin beneath.  Then peel the shell and skin from the chestnut.  Repeat with remaining warm nuts then steam-roast another batch and peel.  Continue until all the nuts have been peeled.  You should have about 1 ¾ lbs. (800g) peeled nuts.

Vanilla-Chestnut Jam // Milly's Kitchen

To make the jam:
Put a few small plates in the freezer so you can check the set of the jam later.

Place the peeled chestnuts in a large stockpot or Dutch oven.  Add a pinch of salt and enough water to cover the nuts by 2 inches.  Bring to the boil, then reduce the heat and simmer until the nuts are very soft but not falling apart, 40-55 minutes. The time will vary depending on the size of your chestnuts. When done, the chestnuts should feel starchy and you should be able to easily smash them to a paste with a fork.

Drain the nuts, reserving the cooking water.  You should have roughly 2 ¼ lbs. (1kg) cooked chestnuts.  

Place the nuts in a food processor (you may need to work in batches). Measure out ⅔ cup of the cooking water, and set aside for use later. Process the nuts to a very smooth paste, adding some of the remaining cooking water as necessary to get them moving. The chestnut puree will get thick and look sandy as you process it; just keep adding cooking water until it moves again. Let your food processor run for a minute or longer to make sure the paste is quite smooth. If you use all the remaining cooking water to get your machine moving and need a bit more, just use tap water. The amount of water needed will vary depending on how powerful your food processor is and on the size of the bowl.  Set the chestnut puree aside.

Slice the vanilla bean in half lengthwise.  Using a paring knife, scrape the seeds from the vanilla bean into the sugar.  Rub the vanilla seeds into the sugar to distribute them evenly.
  
Rinse the pot you used to cook the chestnuts.  Place the vanilla sugar, the scraped vanilla bean pod, lemon juice and the reserved ⅔ cup (200mL) cooking water in the pot.  Cook over medium heat, stirring frequently, until the sugar has dissolved. Increase the heat to high and bring the sugar mixture to a boil. Continue to cook over high heat until the sugar mixture starts to foam. Add the chestnut puree and whisk well to combine, taking care not to splash any of the hot sugar syrup on yourself. The jam will darken as you cook it.

Cook at a rolling boil for 3 minutes then check for a set using the plates you placed in the freezer: place a teaspoon or so of the jam on the frozen plate and wait 10 seconds for it to cool. Rotate the plate. The jam should not run like a liquid, but have the consistency of loosely set jam. It will not wrinkle like jams with pectin to tell you it’s done, so just look for a consistency you like. If it is too loose for your taste, cook the jam for another 30-60 seconds and check for a set again. When the jam has reached your desired consistency, remove the pot from the heat and ladle the jam into the clean, sterilized jars.  Process the jam or cool it and then store in the refrigerator or freezer. The jam will keep in the refrigerator for up to one month and in the freezer for up to a year.

Makes 5-6 cups.

Vanilla-Chestnut Jam // Milly's Kitchen

I was thrilled to collaborate with the super-talented and lovely Rina Jordan on the images for this post.  All images above (except the chestnuts in the blue bowl) were taken by her. You can see more of her beautiful photography here