winter

on nourishing yourself + lemony parsnip and white bean soup

lemony parsnip and white beans soup on millys-kitchen.com

Hello, beautiful people!

I’m back home in Seattle after our trip to Paris and Brussels and feeling super excited for the new year! I always forget how much good it does me to step out of my day-to-day routine and how travel energizes me like nothing else. There was a piece of me that didn't want to leave town before our trip. I could imagine nothing better than spending the holidays catching up on sleep and work. What the eff was I thinking?!? 

lemony parsnip and white beans soup on millys-kitchen.com

This trip was one of the best ever. I feel like I might say that after every trip, but somehow it’s always true. I walked all over the city. I ate amazing food. I got enough sleep for the first time in ages. I connected with some awesome people doing very cool things. I am starting 2017 feeling full of creativity and inspired to bring new projects to life! (Want to come with me to Paris next time? Click here.)

The benefits of our trip have carried over into my routine back in Seattle as well. December was pretty disastrous in the self-care department. But since I’ve been home, I’ve been eating better, going to sleep at a reasonable hour and exercising again. All of which makes me realize how important nourishing myself physically and emotionally is for creativity. 

lemony parsnip and white beans soup on millys-kitchen.com

Before I dragged my ass onto our flight to Paris, I was interested in precisely nothing. I was feeling seriously burnt out and uninspired. Photography: don’t care. Writing: nope. Cooking: hardly. I had slid into old habits of pushing myself to the edge of my mental and physical limits with work, shitty food and a sleep deficit no amount of coffee could compensate for. 

Now that I’m home and feeling excited to create again, I’m writing this post as a reminder to myself (and maybe to you, too) that when we stop taking care of ourselves, everything else falls out of whack.

lemony parsnip and white beans soup on millys-kitchen.com

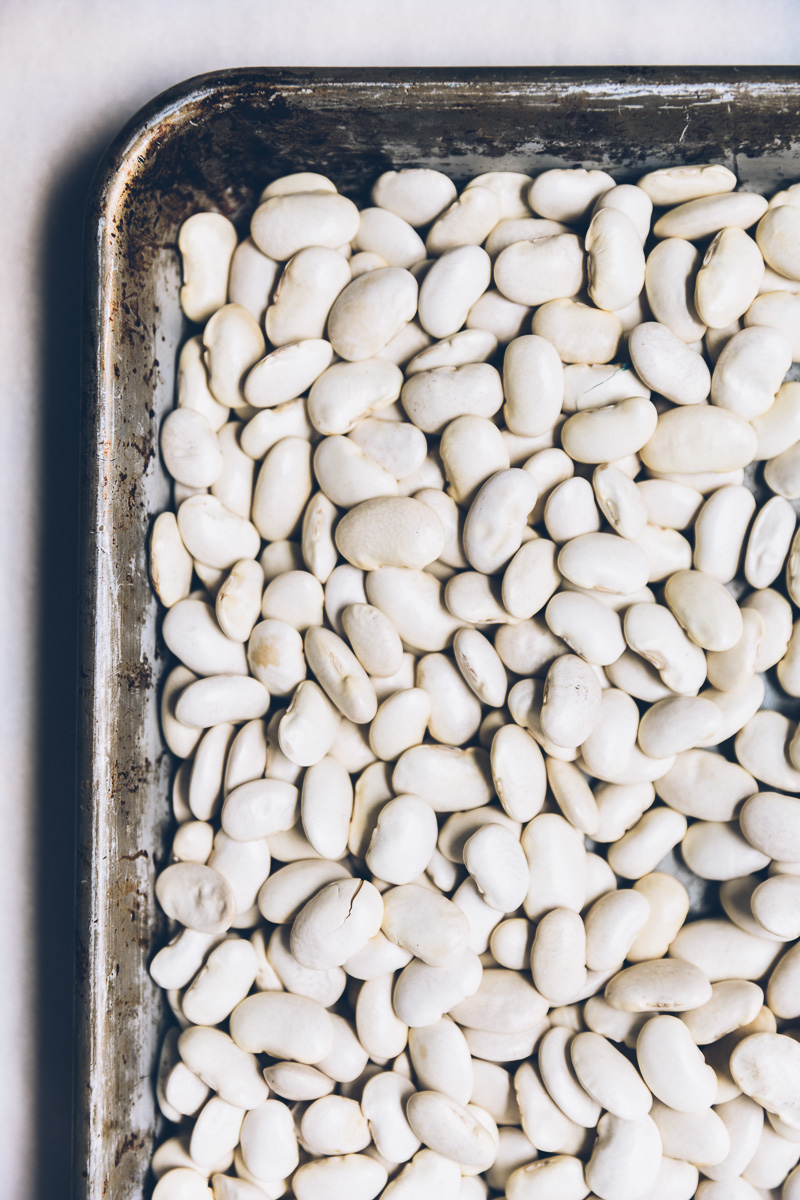
In 2017, I aim to nourish myself with good food, sleep, connection and travel. One way I keep myself eating well is to fix a big pot of soup for the week. This Lemony Parsnip and White Bean Soup is one of my favorites. It’s got all the good stuff: kale, beans, garlic, olive oil. Simple, hearty and comforting, it’s perfect for staving off the winter blues or a nasty cold. As part of my intention to stay healthier, happier and saner in 2017, I’ll be cooking up a pot (or two or three) of this warming soup in the new year.

xo,

Olaiya

P.S. I’d love to hear back in the comments how you’ll be taking care of yourself in 2017. And for those of you looking to spark your creativity through a retreat in Paris next year, click here!


Lemony Parsnip and White Bean Soup

  • 1 lemon
  • ¼ cup extra virgin olive oil, plus additional to serve
  • 1 medium leek, halved lengthwise and sliced into thin half moons
  • 2 cloves garlic, minced
  • Kosher or sea salt and freshly-ground black pepper
  • 3 medium carrots, peeled and cut into ¼-inch rounds
  • 4 medium parsnips, peeled and cut into ¼-inch rounds
  • 1 bay leaf
  • 6 cups vegetable stock, chicken stock or bean cooking liquid (if you cooked your own beans)
  • 1 bunch kale (I like lacinato), stems removed and torn into 2-inch pieces
  • A nice hunk of parmesan rind (optional)
  • 2 cups cooked white beans (preferably homemade)
  • Grated parmesan (optional), to serve

*Notes: You can leave out the parmesan for a vegan soup. 

- When I have time, I like to cook this soup a little longer to let the lemon peels soften and then serve the soup with the peels left in. When cooked long enough, they're almost like preserved lemons.

- For a heartier meal, I sometimes serve this soup with pasta in it. I like conchighlie, trofie, gemeli and orecchiete in particular, but any bite-sized pasta will do. In order to keep the pasta from getting soggy in the soup, I always cook it separately until al dente, then place it in the individual bowls and top it with hot soup just before serving. I think this soup would also be lovely served with a grain like farro or barley.

- For a non-vegetarian version, shredding some cooked chicken into the soup is delicious.

lemony parsnip and white beans soup on millys-kitchen.com

Use a peeler to cut 4 1-inch-wide by 3-inch-long strips of zest from the lemon. Once the zest is removed, juice the lemon. Set the juice and zest aside.

In a large stockpot or Dutch oven, heat the olive oil over medium heat. Add the leek, garlic and a generous pinch of salt and a few grinds of black pepper. Cook, stirring occasionally, until the leek is translucent and soft, but not browned, 5-8 minutes. Add the carrots, parsnips, bay and lemon zest and saute for another 4-5 minutes, until the parsnips begin to soften.

Add the stock, kale, parmesan rind and beans to the pot and bring the soup to a boil. Reduce the heat to a simmer and cook gently until the kale and parsnips are tender, about 10-15 minutes. Stir in lemon juice to taste and season the soup with salt and pepper. Cook for a few more minutes to allow the flavors to come together.

To serve, remove the parmesan rind, strips of lemon zest and bay leaf from the pot. Ladle the soup into serving bowls. Drizzle a bit of olive oil over the soup and sprinkle with parmesan (if using) and some more black pepper. Serve hot.

Makes 6 servings.

Inspired by this recipe by Heather over at Flourishing Foodie.

salt-roasted beef with lemon-hazelnut pesto, pears and celery root

salt-roasted beef with lemon-hazelnut pesto on millys-kitchen.com

Hello from Paris!

I hope you had a beautiful Christmas. I was a bit under the weather/jet-lagged, so Beau and I had a pretty mellow holiday: a walk over to Notre Dame to hear the Christmas bells toll, a leisurely stroll through the Luxembourg gardens with a stop for coffee at the Café de Flore. A seafood extravaganza for two and early to bed. We didn’t even pop the bottle of champagne we bought!

salt-roasted beef with lemon-hazelnut pesto on millys-kitchen.com
Salt-Roasted Beef with Lemon-Hazelnut Pesto, Pears and Celery Root

But I’m planning to make up for our rather subdued Christmas celebration in a few days. As far as I’m concerned, there’s no better place to ring in the new year than the city of light. Beau and I have a table booked at one of our favorite restaurants. There will be oysters. There will be champagne. There will be all manner of other deliciousness and then there will be heading out into the chill to watch the Eiffel Tower sparkle over the city. 

salt-roasted beef with lemon-hazelnut pesto on millys-kitchen.com

But before all that, let’s talk about your New Year’s Eve dinner. 

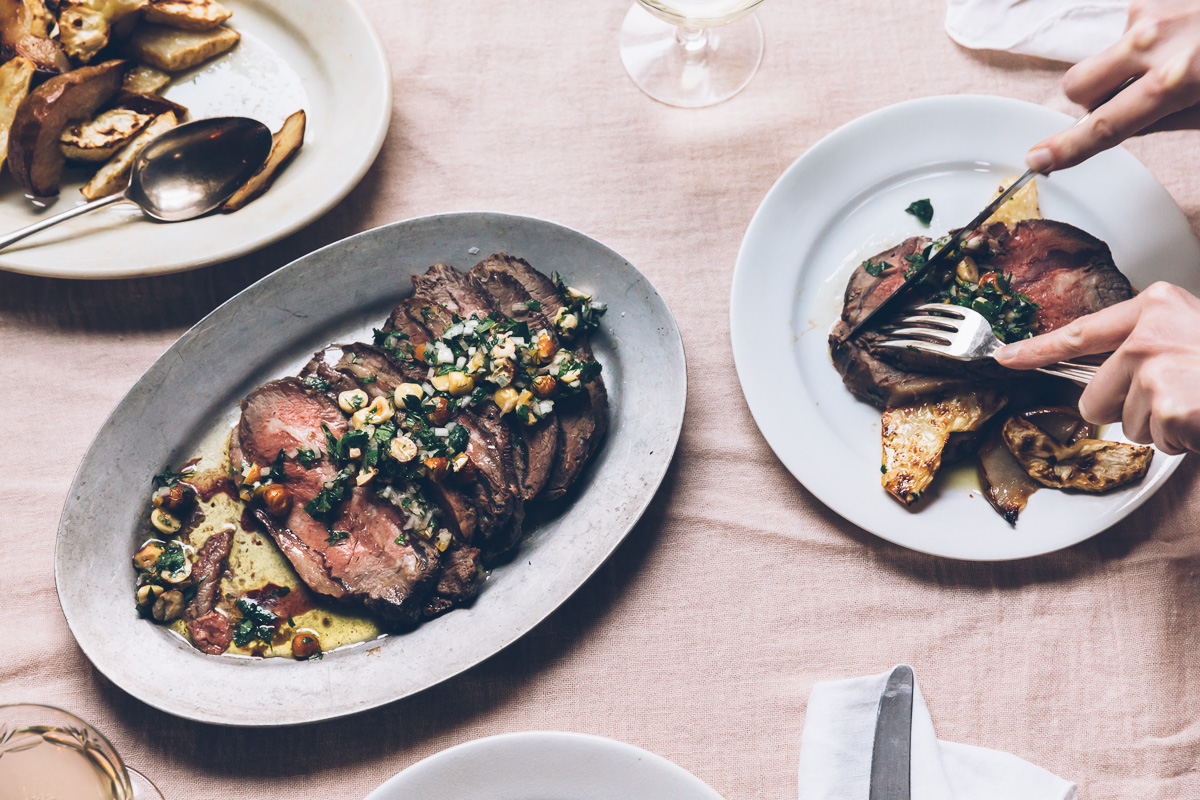
If I were home, I’d be fixing this Salt-Roasted Beef with Lemon-Hazelnut Pesto, Pears and Celery Root. My friend Kyle and I served this at the pop-up dinner we hosted earlier this month. This beauty is Kyle’s invention. How he comes up with such creative dishes, I have no idea. Also, it takes him about two seconds to whip up an entire menu. Without cracking a cookbook. While I am jealous, I am also thrilled to be the beneficiary of his chef-brain. And even more thrilled that I got to eat this dish three times in one month: once while we were testing it, once at the dinner and again when I shot it for the blog with my friend Carrie

salt-roasted beef with lemon-hazelnut pesto on millys-kitchen.com

This roast sits at the intersection of easy and impressive. Exactly what you want on a holiday where you should be sipping champagne with your guests instead of sweating away in the kitchen. The salt crust seasons the meat while sealing in all the delicious juices. The roasted pears and celery root are a meltingly soft, subtly sweet base for the beef--far sexier than mashed potatoes. And the bright, herby pesto makes it all sing. Plus, how often do you get to smash open your meal with a hammer? Very exciting stuff.

However you decide to ring in 2017, I hope it brings you joy. Thank you for following along here and for all your kind comments and emails over the past year. You make this adventure I’m on so much more fun! 

With much love,

Olaiya


Salt-Roasted Beef with Lemon-Hazelnut Pesto, Pears and Celery Root

  • 2-3 lb boneless cross-rib roast (also known as a flat iron roast)
  • 6 cups kosher salt
  • 3 egg whites
  • ½ cup cold water
  • Freshly-grated black pepper
  • 1 recipe Lemon-Hazelnut Pesto (below)
  • 1 recipe Roasted Pears and Celery Root (below)

Lemon-Hazelnut Pesto

  • ½ cup hazelnuts

  • ¼ cup mint, gently packed

  • ¼ cup parsley, gently packed

  • ¼ cup cilantro, gently packed

  • 2 tablespoons dill

  • 1 preserved lemon

  • ¼ cup minced shallot (about 1 large)

  • Finely grated zest of 1 lemon

  • Juice of 1 lemon

  • ½ teaspoon kosher salt

  • 1 cup hazelnut or olive oil


Pears and Celery Root

  • 2 slightly underripe pears

  • 1 large celery root

  • Extra-virgin olive oil

  • Kosher salt


*Notes: My wonderful neighborhood butcher turned me onto the boneless cross-rib (or flat iron) roast called for in this recipe. I love this cut because it’s flavorful and a great value when you’re feeding a crowd. It does have more connective tissue and marbling in it than some other cuts (sort of like a prime rib roast). If that’s not your thing, you might want to consider a different cut of beef. They’re considerably more expensive, but a tenderloin roast or strip roast never disappoint. 

- If you roast or grill a larger cut of meat even once a year, I recommend you purchase a corded meat thermometer like this one. You stick the probe in the middle of your roast, while the display sits on the countertop by your oven. Set the desired temperature and it will beep when your meat is ready. No opening the oven door and letting out the precious heat. No guessing as to when your roast will be the exact doneness you like. A corded thermometer will take your roast game to a whole new level. 

salt-roasted beef with lemon-hazelnut pesto on millys-kitchen.com

Remove the beef from the fridge about an hour before you want to cook it so it can warm up slightly.

Preheat your oven to 375°F. Spread the hazelnuts on a rimmed sheet pan and toast until the nuts turn golden-brown and fragrant, 8-12 minutes. Transfer to a plate to cool. When cool, roughly chop the nuts or crush them with the side of a chef’s knife or with a mortar and pestle (no need to peel). Place the nuts in a medium bowl. Roughly chop the herbs and add them to the bowl. Cut the preserved lemon into quarters and scoop out the flesh and toss or reserve for another use. Finely dice the peel and add it to the bowl. Add the minced shallot, lemon zest and juice, salt and olive oil and stir to combine. Taste and adjust seasonings to your liking. Set aside to let the flavors come together.

To prepare the beef, mix the salt, egg whites and water in a large bowl until the salt is evenly moistened. Place a thin layer of the salt mixture just wider than your beef roast on a rimmed sheet pan. Place the beef on top of this layer and generously sprinkle with black pepper. Use the rest of the salt mixture to cover the roast, pressing to seal the beef in. Place in the oven and roast to desired doneness: 120°F for rare, 125°F for medium rare, 130°F for medium. Remove from the oven and set aside to rest, without breaking open the salt crust. (Don't worry if the crust has a few cracks in it when it comes out of the oven; that's fine.) Rest the beef for at least 15 minutes before you crack open the crust and slice it. 

While the beef is roasting, prepare the pears and celery root. Remove the skin and any roots from the celery root and slice into ⅓-inch thick pieces. Core the pears and slice into ⅓-inch thick pieces. Place the pears and celery root on a parchment-lined rimmed sheet pan. Sprinkle generously with salt and  toss with olive oil to coat. When the roast is about 10 degrees under the desired doneness, place the pears and celery root in the oven. When you remove the beef, increase the oven temperature to 475°F and roast until the pears and celery root are tender and golden brown, turning occasionally, 30-35 minutes. 

When the pears and celery root are done, crack open the salt crust on the beef using a rolling pin, meat mallet or hammer. Brush the salt off the beef and slice. Transfer the roasted pears and celery root and the beef to a serving platter. Spoon some of the pesto over the beef and serve immediately, passing the rest of the pesto alongside. 

Makes 6-8 servings.

Recipe by Kyle Wisner

salt-roasted beef with lemon-hazelnut pesto on millys-kitchen.com

seeded toffee bark

seeded toffee bark on Millys-Kitchen.com

Hello, lovely people!

Despite my careful planning, I have about a gazillion things to do before we leave town for the holidays. (How does that always happen?) But I wanted to leave you with one more homemade holiday gift idea before I jump on my plane!

seeded toffee bark on Millys-Kitchen.com

If you read last year’s holiday post, you know I’m a huge fan of giving chocolate bark. It’s easy, beautiful and can be topped with almost anything you have floating around in your cupboards: chopped peppermints, nuts, dried fruit, cereal, candied citrus zest, crushed cookies. You name it.

This year’s bark is a little more involved since it calls for a base of buttery toffee. Don’t be daunted though--it’s not hard at all as long as you have a heavy-bottomed pot and a good thermometer. If you want to get fancy, you can temper the chocolate. Or not. The good news is you top this bark with so many crunchy toasted seeds, it's pretty hard to tell if the chocolate is tempered or not. (Win!)

seeded toffee bark on Millys-Kitchen.com

I’ll be writing to you next from the other side of the Atlantic. Until then, I wish you all a Merry and Bright Holiday!

XO,

Olaiya


Seeded Toffe Bark

  • Vegetable oil or butter for the pan
  • ½ cup (1 stick) unsalted butter
  • ¾ cup granulated sugar
  • ½ cup (packed) light brown sugar
  • ½ teaspoon kosher salt
  • 1 teaspoon vanilla extract
  • ¼ teaspoon baking soda
  • 5 oz. bittersweet chocolate (I like 72% Guittard Onyx wafers)
  • ½ cup pepitas (raw hulled pumpkin seeds)
  • 1 ½ tablespoons white sesame seeds
  • 1 ½ tablespoons black sesame seeds
  • 2 tablespoons cacao nibs
  • ½ teaspoon flaky sea salt (I like Maldon)
  • Special Equipment: Instant-read thermometer

*Note: Tempering the chocolate keeps it shiny and gives it a nice snap when you break it. If you decide to temper, the method described below (based on Alice Medrich’s technique) is the easiest I’ve found. A good thermometer makes tempering (and all candy-making) a lot easier. Lots of people use a classic candy thermometer, but I prefer something like this because it's more versatile. If price is not an issue, I think this Thermapen is the best thermometer you can buy.

seeded toffee bark on Millys-Kitchen.com

Brush a large rimmed sheet pan very lightly with oil or rub very lightly with butter. Combine the ½ cup butter, granulated and brown sugars, kosher salt, and 2 tablespoons of water in a large heavy saucepan fitted with a thermometer. Cook over medium-high heat, swirling the pan occasionally, until the thermometer registers 300° (the toffee should be a deep golden brown), 7–9 minutes.

Remove the toffee from heat and carefully stir in the vanilla extract. Sprinkle the baking soda evenly over the toffee and stir just until incorporated (be careful not to overmix). Quickly scrape the mixture onto the prepared sheet pan and tilt from side to side to spread mixture slightly. Do not touch the underside of the pan as it will be very hot. Set aside to cool for at least 10 minutes. Wash and dry the thermometer.

In a small, dry frying pan over medium-low heat, gently toast the pepitas just until fragrant and beginning to pop and brown, about 3 to 5 minutes. Transfer to a small plate and set aside to cool. If your  white sesame seeds are raw, add them to the same pan and toast until light golden brown, 3-5 minutes. Transfer to a small plate and set aside to cool. 

When your toffee is completely cool, prepare your chocolate. Roughly chop 4 oz. of the chocolate. Leave 1 oz. in large pieces and set aside. Fill a small saucepan with 1 inch of water and heat over medium until just under the simmer. Reduce the heat to low or medium-low to keep the water just under a simmer. Place the 4 oz. of roughly chopped chocolate in a medium stainless steel mixing bowl and set over the warm water. Use a flexible spatula to stir until ¾ of the chocolate has melted. Remove from the heat and continue to stir until all of the chocolate has melted, 1-2 minutes. If all the chocolate has not melted, place the bowl briefly over the warm water and stir. 

Use the instant-read thermometer to take the temperature of the chocolate. If it is over 100°F, let it cool to about 100°F. Add the reserved 1 oz. large pieces of chocolate and stir until the temperature reaches 90°F. 

Test to see if the chocolate is tempered by drizzling a little on the blade of a knife and setting aside in a cool place. If the drizzle starts to set within 3 minutes, without streaks or mottling, it is tempered and ready to use. If it still looks wet after 3 minutes, stir the chocolate and chunks for a few minutes more and test again. When the chocolate is tempered, remove the unmelted chunks and set aside for later use.

Pour the melted chocolate over the toffee and spread evenly with an offset or flexible spatula. Scatter the seeds and cacao nibs over the top, then sprinkle with the salt. Set aside until the chocolate is firm, at least 2 hours. 

Lift the bark from the sheet pan with a thin metal spatula then break into large shards.

Makes 2 dozen 2- to 3-inch pieces.

Adapted from Bon Appetit

seeded toffee bark on Millys-Kitchen.com