sides

moroccan vegetable tagine + ras el hanout yogurt

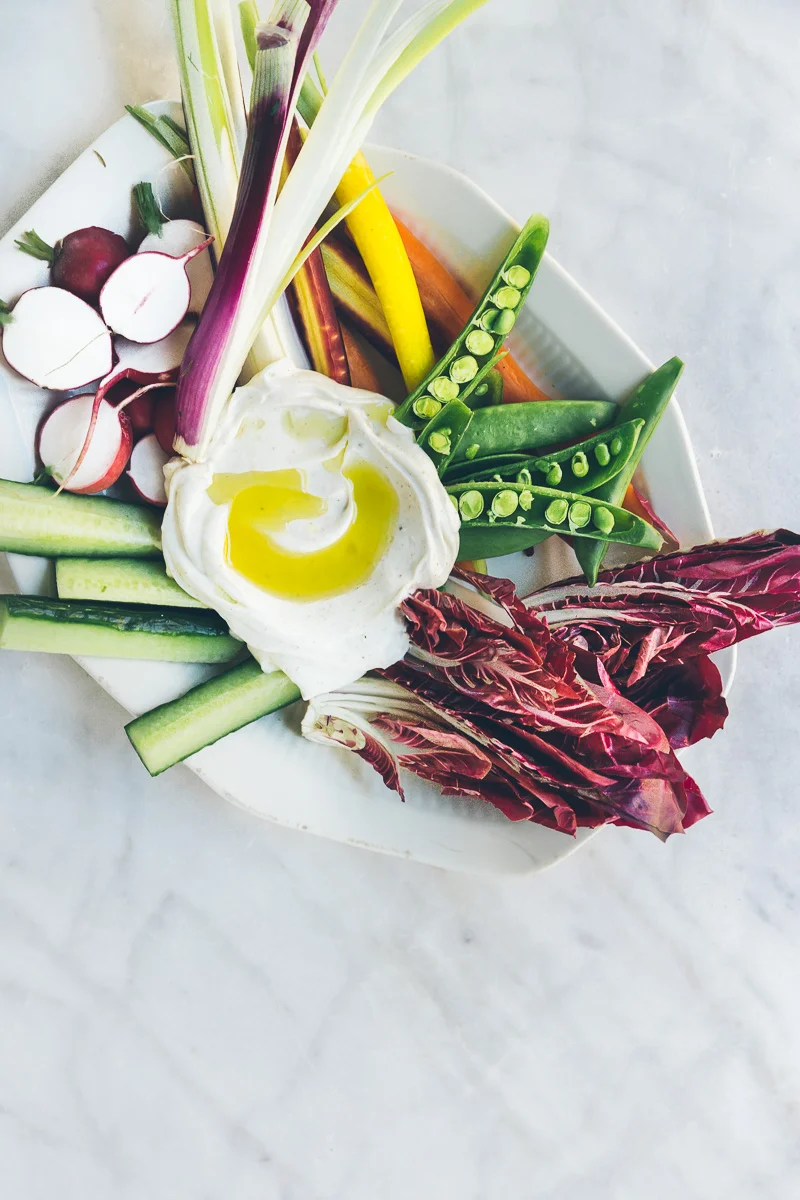
ras el hanout yogurt dip via millys-kitchen.com

People often ask me what we eat at home. They imagine, I think, each of our meals must be an imaginative affair involving hours spent in the kitchen and crowned with an elaborate dessert. 

This is not even close to the truth.

I used to feel guilty about this. I have food-industry friends who have the magic ability to turn a pile of disparate ingredients into a restaurant-worthy meal. These particular friends (a ridiculously stylish and affable couple to boot) seem impervious to the siren song of a bowl of breakfast cereal for dinner.

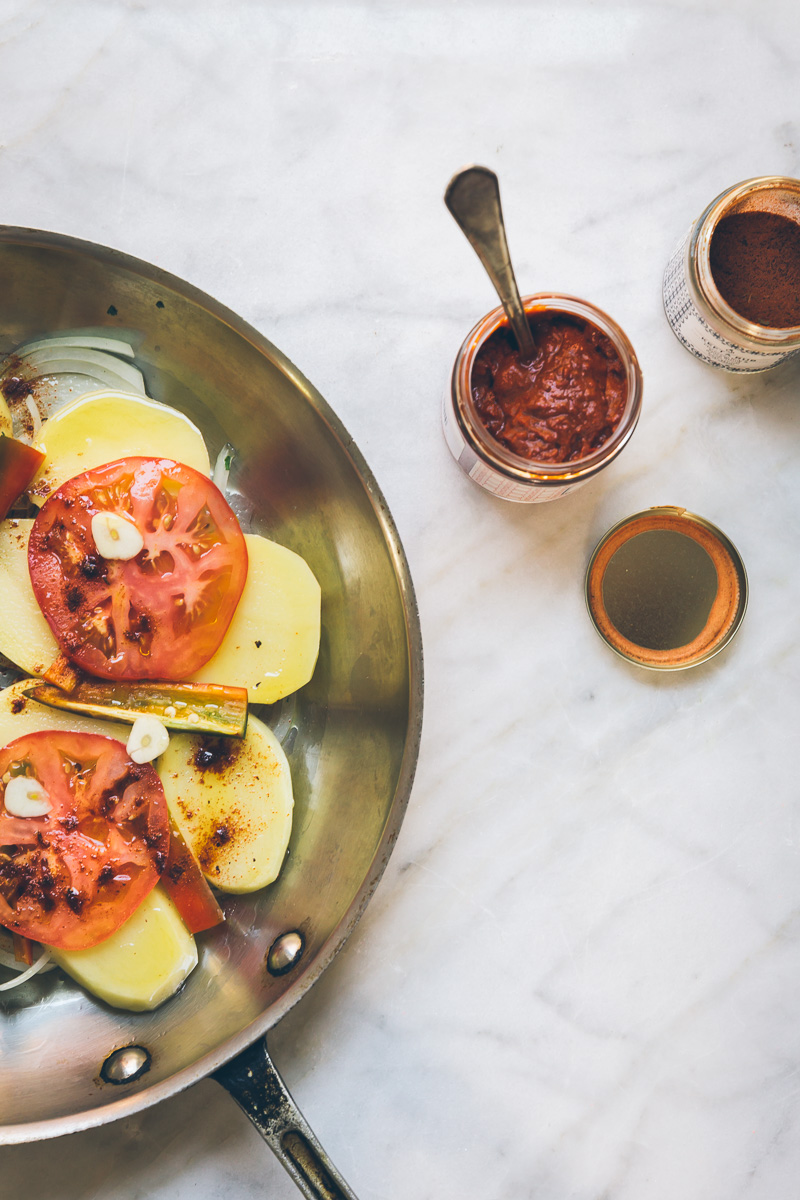
moroccan vegetable tagine via millys-kitchen.com

I used to think settling for anything less than a beautiful home-cooked repast was a small failure. My inner perfectionist looked on scornfully as I scarfed cold pizza for breakfast or cobbled a pile of wacky leftovers into a “meal”.

Then one day last year, I stepped back and looked at this pile of crazy thinking. “Seriously?”, I asked myself. “We both know that may be possible for some people, but it certainly isn’t for you, my dear.” There simply aren’t enough hours in the day to craft an elaborate meal each evening. So I let it go.

It helped that I’d recently returned from a trip to Brussels and Paris where I’d seen friends throw together delicious, seasonal meals on the fly. Steamed artichokes dipped in garlic yogurt with a bottle of white wine. Scrambled eggs and mushrooms on toast. A few slices of ham and a wedge of cheese with a handful of radishes from the garden. I decided these sur le pouce meals were just what I wanted my weeknight suppers to be. Simple. Straightforward. Delicious. 

moroccan vegetable tagine via millys-kitchen.com

After a little experimenting, I've found my groove. Scrambled eggs are my new best friend. A plate of charcuterie and cheese comes together in 5 minutes. A jar of mustardy vinaigrette shaken together on a Sunday night makes salads a cinch all week long. And--another trick I learned from the French--a glass of good wine elevates even the humblest fare.

For those of you who feel pressure to produce a culinary masterpiece seven nights a week, I suggest you give the on-the-fly method of weeknight dining a go. If you need a little nudge, I have two in-a-flash recipes for you from my friend Mehdi.

ras el hanout yogurt dip via millys-kitchen.com


In addition to being a charming human being, Mehdi is also an amazing cook. Oh, and he knows a ton about Moroccan food, too. His company, Villa Jerada, started off as a venture to import his neighbor’s olive oil from Morocco to the U.S. It has grown to include high quality Moroccan oils, spices and artisan-made goods. When Mehdi stopped by a couple weeks ago to drop off some olive oil and a tin of his wildly fragrant saffron, he offered to show me some new ways to work Moroccan ingredients and techniques into quick weeknight meals. (Score!)

ras el hanout yogurt dip via millys-kitchen.com

His vegetable tagine takes about 15 minutes to prep and turns out fragrant and silky with olive oil. His three-ingredient Moroccan-spiced yogurt is the essence of simplicity. (And super addictive. You’ve been warned). Accompanied by a plate of crunchy vegetables and a soft-boiled egg or two, these recipes make a perfect on-the-fly summer meal. 

Don’t forget the wine.


Moroccan Vegetable Tagine

  • 1 small onion, thinly sliced
  • 4 medium yukon gold potatoes, peeled and sliced ¼ inch thick
  • 1 large tomato, cored and sliced ¼ inch thick
  • 1-2 Anaheim peppers, seeded and sliced lengthwise ¼ inch thick
  • 1 clove garlic, very thinly sliced
  • About 1 ½ cups water
  • 3-4 tablespoons best quality olive oil
  • 1-2 tablespoons harissa
  • 1 teaspoon kefta rub
  • 15 saffron threads
  • Sea salt + freshly ground black pepper
  • About 8 small sprigs cilantro, plus additional to garnish

*Notes: I can’t recommend the whole line of Villa Jerada spices, rubs and olive oils highly enough! I’ve been cooking Moroccan food for over a decade and these are the best ingredients I’ve ever worked with. In this dish, I used Mehdi’s Dessert Miracle olive oil along with Villa Jerada harissa, kefta rub and saffron. See below for Seattle stockists and online resources.

- If you can’t find Anaheim peppers or if you want a milder or spicier option, feel free to substitute another pepper. I think this would be nice with either very thin slices of jalapeño or serrano (to mitigate the heat) or ¼-inch slices of red bell pepper.

moroccan vegetable tagine via millys-kitchen.com

Scatter the onions over the bottom of a large sauté pan or tagine and salt lightly. Tile the sliced potatoes over the onions. Arrange the sliced tomatoes, peppers and garlic over the potatoes. Pour the water into the bottom of the pan. The precise amount will vary slightly based on the size of your pan, but you want enough to form a thin layer over the bottom of the pan, just covering the onions. Pour the olive oil over the vegetables. (Don’t skimp on the olive oil, it’s part of what makes the potatoes silky and soft when they’re done cooking.) Dot the harissa over the vegetables. Season generously with salt and a few grinds of black pepper. Sprinkle with the kefta rub and saffron then arrange the cilantro sprigs over the top.

Bring the water to a gentle simmer over medium heat then cover and cook until most of the water has evaporated, the potatoes are cooked through and the tomatoes are starting to fall apart, about 20 minutes. You may need to reduce the heat a little. If there’s still a little water in the bottom of the pan when the vegetables are done, remove the lid and cook off the excess.

Sprinkle with additional cilantro to garnish, if desired, and serve in the pan.

Makes 3-4 servings.

Recipe by Mehdi Boujrada


ras el hanout yogurt dip via millys-kitchen.com

Ras El Hanout Yogurt

  • 1 ½ cups full-fat greek yogurt or labneh
  • 2 teaspoons Villa Jerada ras el hanout spice blend
  • 2 teaspoons honey
  • Best quality extra virgin olive oil, to serve
  • Raw sliced vegetables, to serve

*Note: I love all the Villa Jerada products but the ras el hanout spice blend is especially fantastic. It's much more delicate and floral than any other version of the spice blend I've tried. It works perfectly with the honey in this dip. 

Whisk the yogurt, ras el hanout and honey together in a medium bowl. Set aside for 10 minutes to allow the flavors to come together. Serve with vegetables and topped with best quality olive oil. (I used Les Terroirs de Marrakech extra-virgin olive oil.)

Recipe by Mehdi Boujrada


Where to by Villa Jerada products in Seattle:


Where to buy Villa Jerada products elsewhere and online:

moroccan vegetable tagine via millys-kitchen.com

grilled hanger steaks with asparagus, spring onions and preserved lemon relish

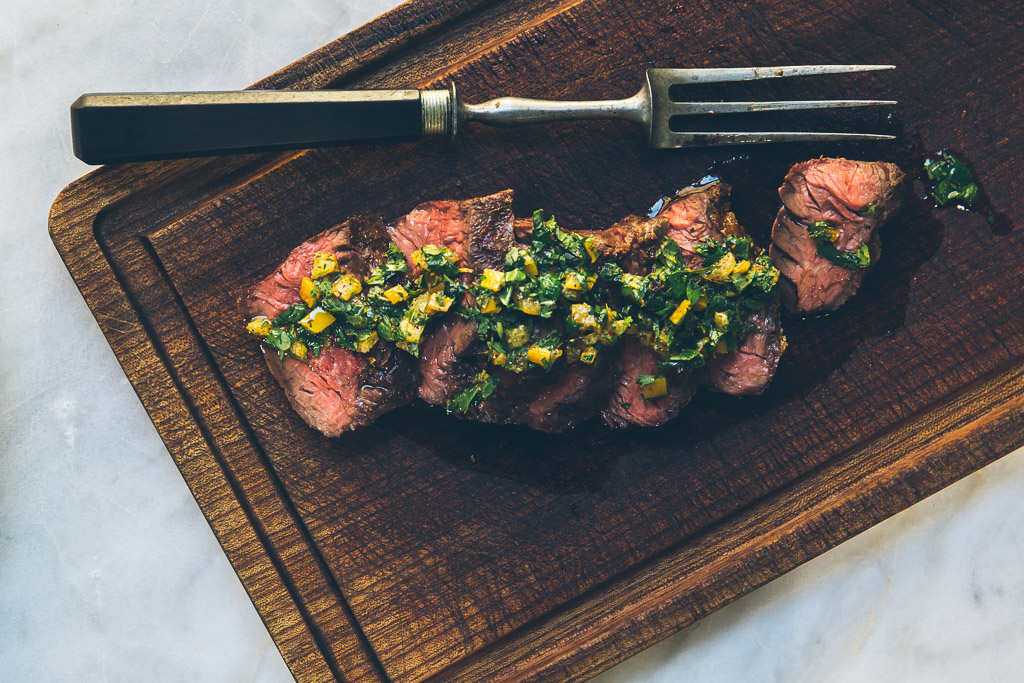
grilled hanger steak with asparagus, spring onions and preserved lemon relish via millys-kitchen.com

If you’ve been following along here for a while, you know I’m someone who loves to make unrealistically grandiose plans. I’ve got list upon list brimming with big ideas for improving the house, the yard, this blog, my photography skills, my wardrobe and my general person (among other projects).

I’m itching to completely tear up the yard of our new house and transform it into the just-unkempt-enough cottage garden I’ve been dreaming of for over a decade. I want to rip out the kitchen floor, teach myself to lay tile and put down handmade hex tile from Morocco. I want to browse Pinterest from top to bottom until I finally find THE haircut for my unruly curls. I want to get up at dawn every morning to catch the day’s first rays with my film camera. I want to string lights from the trees in our backyard and host large, raucous dinner parties every weekend.

grilled hanger steak with asparagus, spring onions and preserved lemon relish via millys-kitchen.com

A past version of me would be spending the evening mapping out my plan of attack for all these summer projects rather than writing this blog post. There would be lots of lists and diagrams. Maybe even a full-on crazy wall like the ones you see in the movies with maps and mysterious photos and lots of zig-zagging red string.

But I’ve got a different plan this year. My plan is something called Operation Summer Simplicity. It involves letting the yard and garden do their thing for a season to see what’s what. It involves living with the perfectly fine kitchen floor I have until I decide what I really want. It involves occasionally getting up early to shoot with my film camera. Operation Summer Simplicity is all about leaving enough space in my days that I can actually enjoy the one truly phenomenal season we get here in Seattle. 

grilled hanger steak with asparagus, spring onions and preserved lemon relish via millys-kitchen.com

While I’m pretty sure there won’t be a weekly dinner club happening in my back yard, having friends over for an al fresco meal is one of the highlights of summer for me. To that end, I’ve decided I need an uncomplicated approach to hosting dinners here at the house. That’s where my trusty Weber grill comes into play. Fire it up, throw on a beautiful cut of meat and some seasonal vegetables, uncork a bottle of wine and you’re doing summer right. 

So know this, friends: if the weather is warm and you come to my house for dinner, you will very likely be eating something from the grill. Something like this Hanger Steak with Asparagus, Spring Onions and Preserved Lemon Relish, for example.

grilled hanger steak with asparagus, spring onions and preserved lemon relish via millys-kitchen.com

I had a chance to test this recipe out a couple weeks ago when our friends Alex, Kelsey, Carlos and Susanna came over for dinner on an unseasonably warm evening and I have to say it was perhaps the easiest, breeziest dinner party I’ve ever thrown. Of course that's partly because we had invited some of our chillest friends. But I'm going to give the Weber credit for the rest. Score victory number one for Operation Summer Simplicity. 


Grilled Hanger Steaks with Asparagus, Spring Onions and Preserved Lemon Relish

  • 2 hanger steaks, about one lb. each, patted dry with paper towels
  • Coarse sea salt
  • 1 ½ lbs asparagus (buy the fatests stalks you can find so they don't fall through the grill grate)
  • 6-8 thin spring onions
  • Extra virgin olive oil
  • 1 recipe Preserved Lemon Relish (see below)
  • Special equipment: a corded instant-read thermometer

*Notes: Ideally you want to salt the steaks at least 4 hours before you intend to grill them. If you forget or don’t have enough time, it’s not the end of the world, but salting the steaks in advance helps to season and tenderize them, so it’s worth the extra step. The steaks can be salted up to 24 hours in advance. 

- A corded instant-read thermometer may seem fussy, but unless you’re a professional, it’s really the only way to cook your steak perfectly every time. Bonus: you won’t have to open the oven door or grill lid a gazillion times and let all the heat escape while you’re cooking.

- Here's a great list of tips for grilling. Here's another.

grilled hanger steak with asparagus, spring onions and preserved lemon relish via millys-kitchen.com


At least 4 hours before you intend to grill the steaks, sprinkle them very generously with about 2 teaspoons of salt each. Lay the steaks on a plate and place them, uncovered, in the refrigerator. If you think of it, turn them over once or twice while they're hanging out in the fridge. This allows the surface to dry out more, which leads to better browning on the grill. Remove the steaks from the refrigerator about an hour before you intend to grill them and let them sit at room temperature.

Snap the woody ends off the asparagus and place them on a rimmed sheet pan. Trim any wilted ends from the onion greens. If they're long cut the green tops off the onions along with a bit of the pale green or white part to hold them together. Cut the hairs from the root-end of the onions, but leave enough of the root to hold the onions together. Cut the bulb end in half lengthwise if it's thick. Place the onion tops and bulbs on the sheet pan with the asparagus, keeping them separate. Pour enough olive oil on the asparagus and onions to coat them well and use your hands to rub the oil onto the vegetables, especially the tips of the asparagus. Generously sprinkle with salt.

Use your hands or a silicone pastry brush to generously coat the steaks with oil. Insert the thermometer into the center of one of the steaks. Take care not to angle it up or down or you'll get a false reading.

grilled hanger steak with asparagus, spring onions and preserved lemon relish via millys-kitchen.com

If you are using a gas grill: Light your grill. Turn all the burners to high and preheat the grill with the lid down until it is very hot, 10-15 minutes. 

Place your onions on the grill and cook without turning until they have nice char marks on one side and are starting to soften, 3-5 minutes depending on how hot your grill is. Turn the onions over then place your steaks and asparagus on the grill. Cook the asparagus, turning as needed until they are lightly charred and cooked through. The cook time for your asparagus will vary depending on their thickness. Check them often and take care not to let them get soggy, the goal is bright green, crisp-tender stalks. Remove the asparagus to the sheet pan when they’re done. Continue to cook the onions, turning as needed until they are soft and cooked through then place them on the sheet pan with the asparagus.

Cook your steaks until they are nicely browned and char marks appear on one side, about 2-4 minutes. Turn the steaks and cook until char marks appear on the other side, about 2-4 minutes more. Turn all the burners to medium-low, close the lid on the grill and continue to cook until the steaks reach 115° for rare, 120-125° for medium-rare or 130°-135° for medium. (The steaks will continue to rise in temperature as they rest.) Remove the steaks from the grill and rest for 5 minutes. Slice steaks and serve with grilled vegetables and Preserved Lemon Relish.

If you are using a charcoal grill: Build a 2-level fire in your grill like this (scroll down to number 5). Once your coals are hot and covered in ash, set the grill rack in place, cover the grill and let the rack heat for about 5 minutes.

When the grill rack is hot, grill your veggies as above. When they are almost done, move them to the cooler side of the grill to finish cooking, then place your steaks on the hotter side of the grill. Remove the vegetables to the sheet pan when done. Cook the steaks, uncovered, until they are nicely browned and char marks appear on one side, about 2-3 minutes. Turn the steaks and cook until char marks appear on the other side, about 2-3 minutes more. Move the steaks to the cooler half of the grill and continue to cook to desired doneness (see temperatures above). Remove the steaks from the grill and rest for 5 minutes. Slice steaks and serve with grilled vegetables and Preserved Lemon Relish.

Makes 4 servings.


Preserved Lemon Relish

  • 2 preserved lemons

  • 4 teaspoons finely grated lemon zest

  • ¼ cup cilantro leaves, chopped

  • ¼ cup mint leaves, chopped

  • ¼ cup parsley leaves, chopped

  • 1 teaspoon black pepper

  • ½ teaspoon chile flakes, or to taste

  • 1 cup extra virgin olive oil

  • Sea salt, to taste

grilled hanger steak with asparagus, spring onions and preserved lemon relish via millys-kitchen.com

Run the lemons under cold water to remove excess brine then quarter them. Scoop out the flesh with a spoon and discard. Finely chop the preserved lemon skin and place in a small bowl. Add the rest of the ingredients except the salt and stir well to combine. Taste and add salt if necessary. (Some preserved lemons are salty enough you won't need to add salt.)

Makes about 1 1/2 cups.

kale and citrus salad with vanilla bean vinaigrette

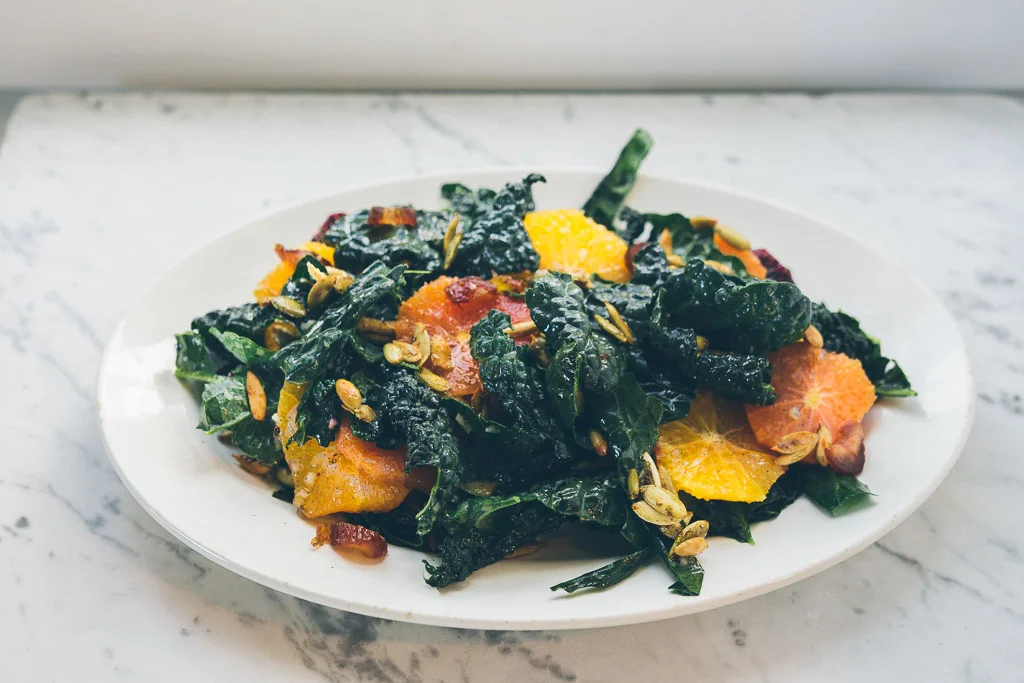
kale and citrus salad with vanilla bean vinaigrette on millys-kitchen.com

As usual, I’m late to the party. 

Because we are well into citrus season, and because you don't live under a rock, you probably know that citrus this year is amazing. 

I, on the other hand, had somehow managed to make it to the middle of February without eating one single orange or grapefruit or pomelo. Which is why I was unaware that we are in the middle of a perfect storm of citrus deliciousness. 

kale and citrus salad with vanilla bean vinaigrette on millys-kitchen.com

I did a little online sleuthing and discovered that last year’s drought, combined with unusually cold weather and rain (finally!) in southern California have resulted in one of the juiciest, most flavorful citrus crops in years. Now I’m on a mission to consume as much citrus as possible before the season ends. I highly recommend you join me.

Peel-and-eat is never a bad strategy. But if you need fresh inspiration for what to do with all that excellent citrus, let me introduce you to one of my favorite winter salads:

kale and citrus salad with vanilla bean vinaigrette on millys-kitchen.com

In true So Cal style, it’s got a variety of jewel-toned oranges, sweet medjool dates and a handful of spicy pepitas for crunch. The kale is sturdy enough for all those big flavors. The vanilla and shallot vinaigrette adds both earthiness and zing. 

I made this for lunch today and decided it’s the perfect salad for jazzing up a grey winter day. Healthy. Bright. And full of bold flavors. 

kale and citrus salad with vanilla bean vinaigrette on millys-kitchen.com

I for one will be making this salad many more times before winter's over. And hoarding as much citrus as I can manage.


kale and citrus salad with vanilla bean vinaigrette on millys-kitchen.com

Kale and Citrus Salad with Vanilla Bean Vinaigrette

  • 1 bunch young kale (I like Lacinato kale), stems removed and torn into bite-size pieces
  • Fine sea salt
  • 4 oranges (I used a mix of blood oranges, cara caras and heirloom navel oranges)
  • 4 large, fresh medjool dates, pitted, halved and sliced crosswise into thin strips
  • 1/2 cup spiced pepitas (see below)
  • 1 recipe vanilla bean vinaigrette (see below)

For vinaigrette:

  • 1 vanilla bean

  • 1 teaspoon sugar

  • 2 tablespoons minced shallot (from 1 small shallot)

  • 1 tablespoon sherry vinegar

  • 1 tablespoon lemon juice

  • Pinch fine sea salt

  • 4 tablespoons olive oil


For spiced pepitas:

  • ½ cup raw hulled pepitas

  • ¼ teaspoon olive oil

  • ¼ teaspoon toasted and ground cumin

  • 1 teaspoon honey

  • Pinch cayenne

  • Pinch fine sea salt


*Note: By the time I finished shooting this salad, I was super hungry and decided it needed a little more substance. I tossed in some leftover roasted chicken and it was transformed into filling lunch. A little leftover roasted salmon would work, too.

kale and citrus salad with vanilla bean vinaigrette on millys-kitchen.com

Place the torn kale in a large bowl and sprinkle lightly with salt.  Rub the salt into the kale leaves (this helps tenderize the greens) and set aside while you make the vinaigrette.  

Using a paring knife, scrape the seeds from the vanilla bean and place them in a medium bowl with the sugar, shallot, sherry vinegar, lemon juice and salt. Add the oil in a thin stream while whisking. Set aside for at least 10 minutes to allow the shallot to mellow and the flavors to come together.

Place the pepitas in a medium skillet and cook over medium heat, stirring often, until they begin to turn golden brown, pop and smell nutty. Immediately transfer the hot pepitas to a small bowl and add the olive oil, cumin, honey and salt. Stir to coat evenly. Taste and adjust seasonings. Set the seasoned pepitas aside to cool.

Slice the peel and pith from the citrus and cut them into rounds about ¼-inch thick. Place them in a small bowl and spoon a bit of the vinaigrette over them. Dress the kale with the vinaigrette to taste. Set the greens and citrus aside for another 10 minutes or so to allow the vinaigrette to work its magic.

kale and citrus salad with vanilla bean vinaigrette on millys-kitchen.com

To assemble the salad, add the citrus (along with any juice at the bottom of the bowl) to the kale. Add half the pepitas and half of the sliced dates. Toss gently to combine. Place the salad on a serving platter or individual plates and top with the remaining dates and pepitas. 

The dressed kale and citrus will hold for a day in the fridge (don’t add the pepitas or they’ll get soggy). The vinaigrette will hold for 3-4 days, tightly covered, in the refrigerator.

Makes 4 servings.