cake

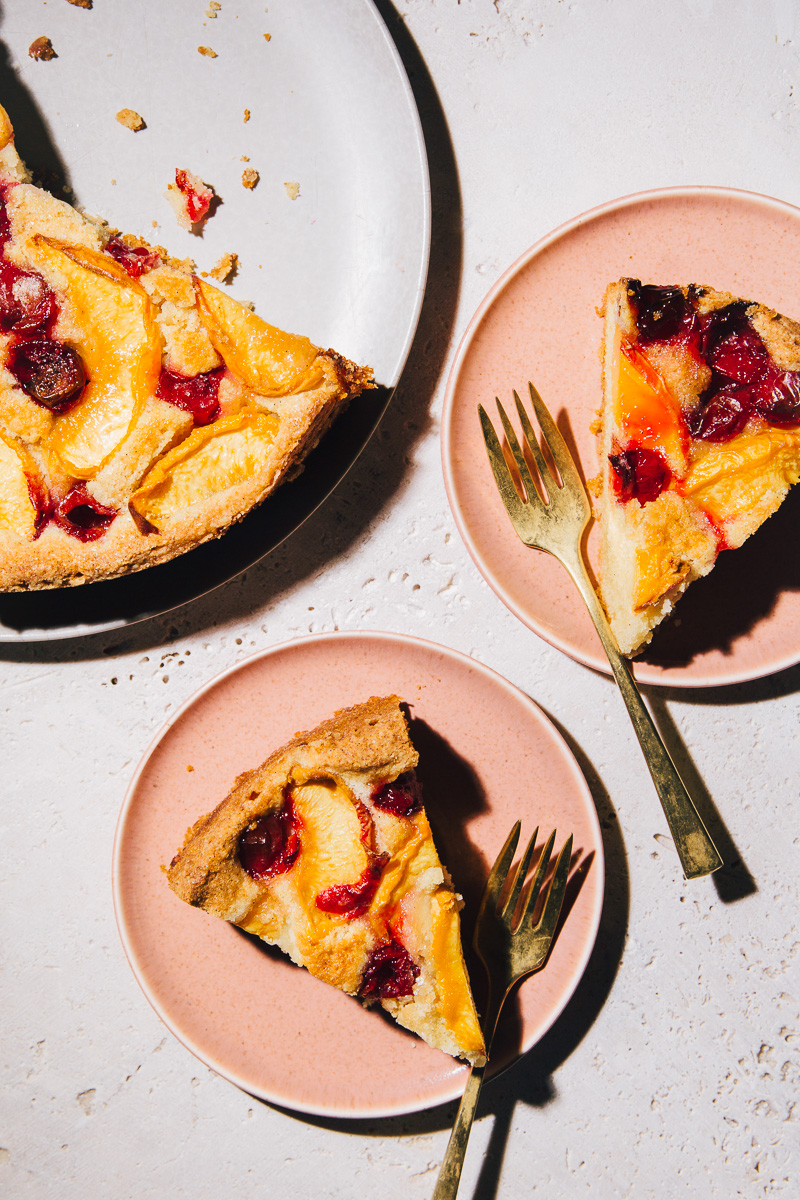
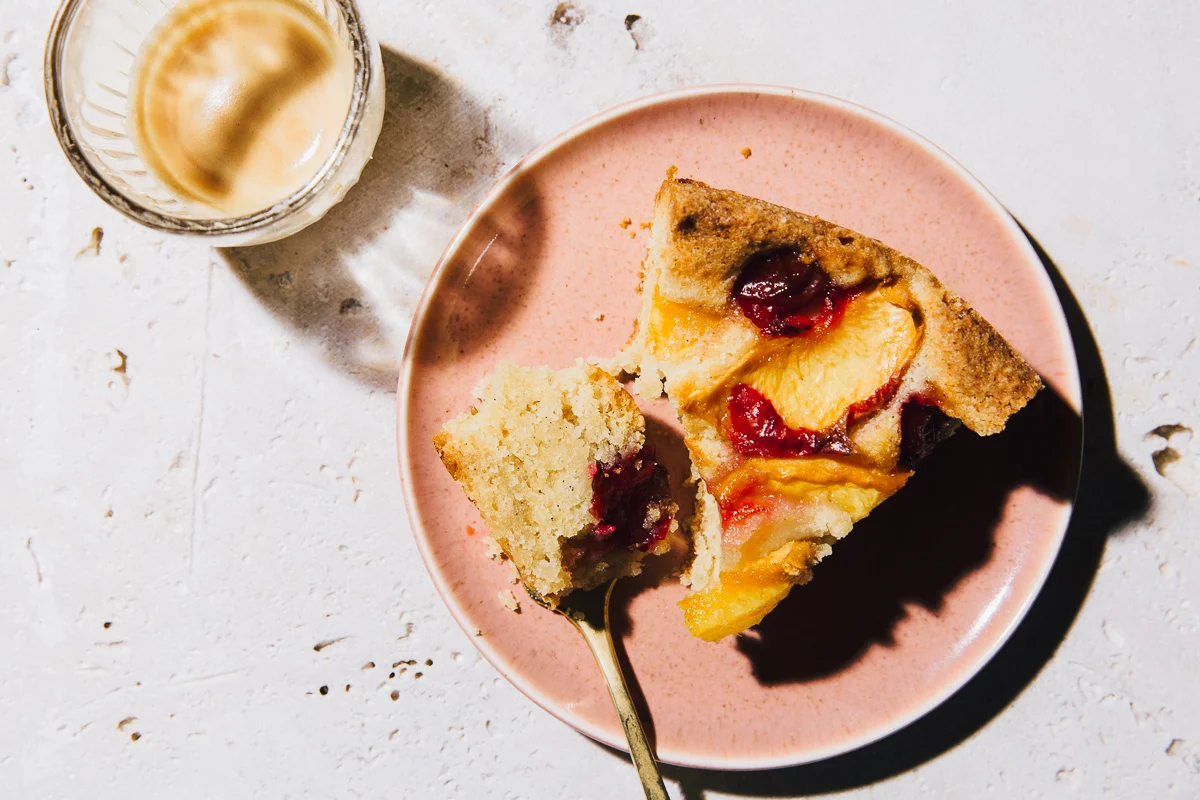
peach-plum buckle

Image & styling: Olaiya Land

I’m celebrating!

I baked this cake in honor of the fact that I am officially done with diets. Hopefully forever.

As I wrote here I have tried pretty much every form of controlling my body known to (wo)man. Starting with disordered eating in my teens all the way through the latest vegan, paleo and keto crazes.

We’re talking ALLLLLLLL the diets. And the un-diets. And the cleanses. And the “lifestyle overhauls”. Always seeking to be thinner. Smaller. To take up less space.

But I am done with that.

Image & styling: Olaiya Land

I am done feeling ashamed that I’m not a size 4. I’m done feeling like a failure because I don’t fit the beauty standard laid out by the diet industry. And fashion magazines. And mainstream advertising. I am done waging war on a body that keeps me healthy and strong. That allows me to experience the joy of playing tennis and lifting weights and hiking in the forest. I’m ready to start treating my body like the miraculous gift that it is.

Oddly, Instagram is largely to thank for this new-found liberation. I’ve started following fitness bloggers who value strength and self-acceptance over thinness. (Whassup @shethrivesblog and @anniemiller.co!) And brands that use models of all shapes, sizes, colors and ages. (Hello @chromat and @universalstandard!) And plus size models who show me that you can be sexy and self-confident at any size. (Yes @jenniferatilemile and @jessicavanderleahy!) And anti-diet crusaders who have made me rethink my attitudes toward how I feed and care for myself. (Thank you @susanhyatt and @thefuckitdiet!)

Following all these women who choose to celebrate the female body in all its amazing forms has helped me realize I don’t need to change a single thing about my beautiful body.

And neither do you.

Image & styling: Olaiya Land

I know that if you are currently feeling the body shame I felt for years, this message is going to sound like a pile of blissed-out bullshit. I have been there. I mean let’s be honest: I’ve lived there for most of my life.

But something has shifted in me lately. Maybe because I’ve gotten older and a little bit wiser. Maybe because I’ve been spending a lot of time in Europe where I feel more balanced and at ease with myself. Who knows. I’ll take it however it comes.

If some part of you thinks you might want to make peace with your body, I highly recommend you check out the bloggers and Instagrammers I linked to above. Taylor Gage and Caroline Dooner have been especially valuable to me on my path towards greater self-love and acceptance.

And wherever you’re at on the path towards loving and cherishing yourself, celebrating yourself with a cake is never a bad move.


Peach Plum Buckle

  • 225g (2 sticks) unsalted butter, room temperature, plus extra for the pan
  • 250g (1 cup plus 4 tablespoons) sugar, divided
  • 1/2 vanilla bean
  • 215g (1 1/2 cups) all-purpose flour
  • 70g (3/4 cup) almond flour
  • 1 teaspoon baking powder
  • 1/4 teaspoon fine sea salt
  • 2 large eggs
  • 2 firm-ripe peaches, sliced 1/2-inch thick
  • 225g (8 oz.) plums, pitted and halved (if small) or sliced cut into 1/2-inch-thick slices (if larger)

*Notes: I love, love, love this cake! I've been making versions of this one since way back in 2006. I almost never make recipes twice. So I guarantee you it's a good one!

- I made this version with cherry plums because we have a cherry plum tree in our front yard. I had never heard of cherry plums until we moved into this house so I don’t think they’re particularly common. I’ve made this with tons of different kinds of plums though and it’s always delicious.

- You can use any variety of stone fruit you like: peaches, nectarines, apricots, plums, cherries, sour cherries (mix these with a little extra sugar if you go that route). Whatever.

- This cake magically gets better and better as it sits. I leave mine covered with a tea towel on the counter and on days 2 and 3 it is PHENOMENAL. (Did I mention I love this cake?)

Image & styling: Olaiya Land

Position a rack in the center of your oven and preheat it to 350°F. Butter a 9-inch cake pan and line the bottom with a round of parchment. Butter the parchment. Then flour the pan, tapping out the excess flour.

Cut the vanilla bean in half and scrape out the seeds with a paring knife. In a small bowl rub the vanilla seeds into 1 cup of the sugar until they are well distributed. Set aside.

In a medium bowl, whisk the flour, almond flour, baking powder and salt to remove any lumps. Using a stand mixer, beat the butter until fluffy. Add the cup of vanilla sugar. Beat until well blended. Add the eggs 1 at a time, beating well after each addition. On low speed, add the flour mixture and mix until just incorporated.

Transfer the batter to your pan (it will be VERY thick). Spread the batter evenly in the pan then arrange the fruit over the batter, pressing it down slightly.

Bake the cake until a tester inserted in the center comes out clean, 80-90 minutes. Cool the cake in the pan on a rack for 20 minutes. Run a small knife between the cake and the pan to loosen it. Then turn the cake out onto a large plate. Remove the parchment paper. Place another large plate or serving platter on top of the cake. Using both hands, hold both plates firmly together and flip the cake again, plum side up. Cool completely before serving.

Makes 8-10 servings

Adapted from Bon Appetit

Image & styling: Olaiya Land

grapefruit vanilla bean trifle

Image: Olaiya Land

In the dreary days of February, my mind turns to spring dreams. Green grass and tiny daffodils elbowing their way up through the soil. The season's first asparagus stalks and baby morels. Raspberries. Strawberries. Apricots! Easter hams and rhubarb pies.

All of which leaves me feeling rather let down when I come back down to Earth and remember we’re still sailing through the mid-winter doldrums.

Image: Olaiya Land

This is a time of year that requires extra creativity in the kitchen. The novelty of autumn’s bounty of apples, pears and squash is long gone. Tender spring things are still weeks away. And Kale, popular and Instagram-friendly as it is, can only take you so far.

Luckily, this is the month we are given citrus.

Image: Olaiya Land

Jewel-toned citrus in all its shapes and forms is the answer to the culinary blues. Bright and subtly floral, it’s the winter ingredient that tricks our palettes into thinking spring is nearly here. 

Sweet-tart grapefruit is my very favorite member of the citrus family. It's annual appearance at the grocery store never fails to brighten my day. Sort of like a beloved uncle who comes around once a year with bad jokes and pocketfulls of candy. 

Image: Olaiya Land
Image: Olaiya Land

It’s difficult to improve upon a perfectly ripe grapefruit section scooped straight from the rind. But as I looked around our kitchen at the mounting piles of grapefruit, I decided it was time to kick things up a notch and transform my winter citrus bounty into something a touch more fancified. 

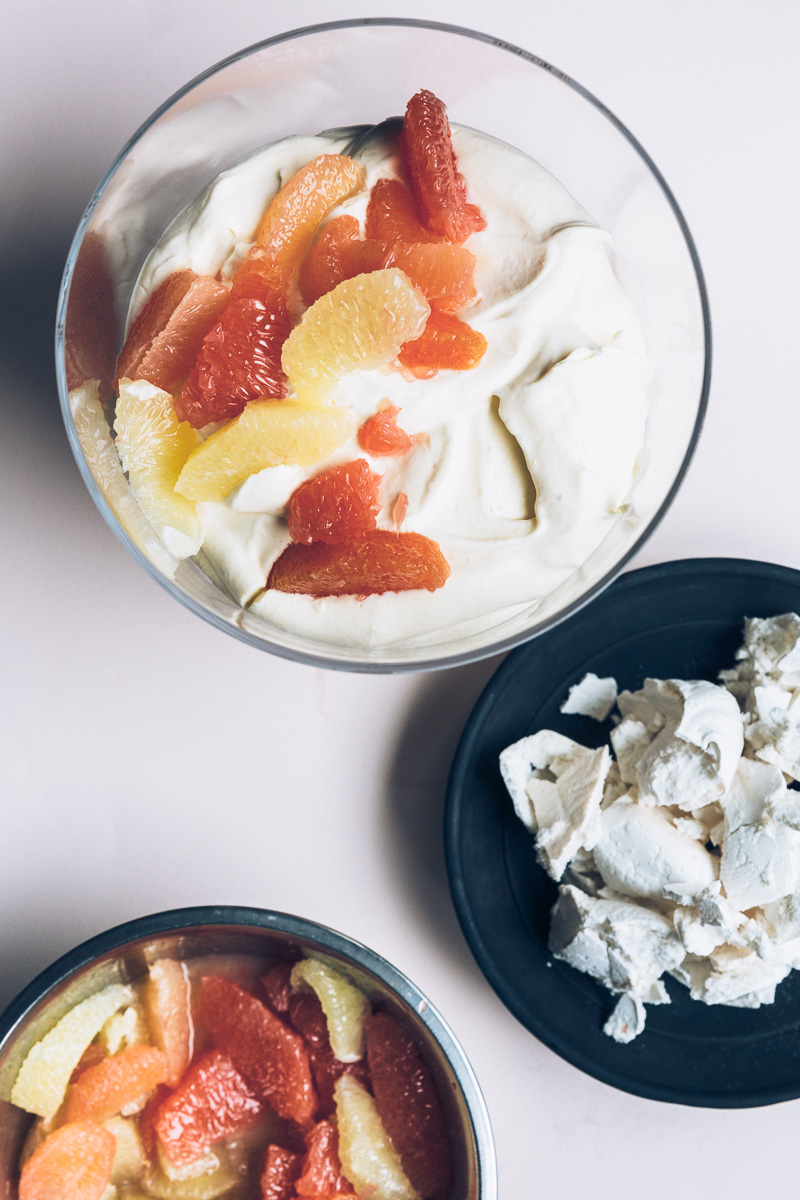
Which leads us to this Grapefruit Vanilla Bean Trifle. It’s a delicious pile of controlled chaos--towering layers of cake, cream, meringue and citrus that collapse into a fluffy, creamy mess when you scoop them into your bowl. This is the sort of dessert that will help you shake off a winter funk. The sort of dish that will make you forget winter all together.

At least until you reach the bottom of the trifle dish.

Image: Olaiya Land

Grapefruit Vanilla Bean Trifle

  • 5 large, ripe grapefruit (I used a mix of red, pink, gold and white grapefruit)
  • 3 cups heavy cream
  • 2 tablespoons sugar
  • 1 recipe Grapefruit Curd, chilled (see below)
  • 1 recipe Vanilla Bean Meringues (see below)
  • 1 recipe Grapefruit Olive Oil Cake, cooled completely (see below)


*Note: This trifle is most beautiful right after you assemble it, before the citrus can release any juices. But it is about a gazillion times more delicious the next day. I recommend you make this a day in advance and store it covered in the fridge until you’re ready to serve it. Leave off the last layer of meringue crumbles until right before you serve it so they stay crunchy.

- Almost all the components of this trifle can be made in advance. The cake can be baked up to 2 days in advance. The curd can be made up to a week in advance. The merengues can be baked a week or more in advance if you bake them fairly dry and store them in an airtight container. 

Image: Olaiya Land

Remove the skin and pith from the grapefruit. Cut the flesh into supremes over a medium bowl so you catch all the juices. (Here’s a video on how to do it.) Set aside.

Place the cream in the bowl of a stand mixer along with the sugar and beat to stiff peaks using the whisk attachment. (You can also use a hand beater or a wire whisk and a mixing bowl.) Take care not to over beat the cream--you want it stiff, but not grainy. Gently fold the chilled grapefruit curd into the whipped cream until only a few faint streaks of yellow remain. 

Cut the cooled cake into roughly 1-inch pieces. Arrange the cake pieces in the bottom of a trifle dish or large bowl in a tight layer. Depending on the size of your dish, you may not use all the cake pieces. You can freeze them for another use, or--my favorite option--snack on them alongside your afternoon cup of coffee or tea. 

Spread half the grapefruit cream mixture over the cake. Arrange half the grapefruit sections over the cream. (Take care to lift them from their juices with your fingers or a slotted spoon so the trifle isn’t too wet.) Crumble a layer of meringue pieces over the grapefruit. Spread the rest of the grapefruit cream over the meringue and top with the rest of the grapefruit sections. Crumble additional pieces of meringue over the trifle just before serving.

Serves 8-10.


Grapefruit Curd

  • 1 tablespoon plus 1 teaspoon finely grated grapefruit zest (from 1 large grapefruit--grate an additional 2 teaspoons zest for the olive oil cake, below)

  • ¾ cup freshly-squeezed grapefruit juice

  • ¼ cup plus 1 tablespoon freshly-squeezed lemon juice

  • 1 cup sugar

  • 5 large eggs

  • 4 large yolks (save the yolks from your meringues for this)

  • Pinch kosher salt

  • 10 tablespoons unsalted butter, cut into 10 pieces


Set a fine mesh sieve over a medium bowl and set aside.

Place the juices, zest, sugar, eggs and salt  in a medium heavy saucepan. Whisk well to combine. Cook over medium-low heat, stirring often with a heatproof spatula, until just warm to the touch. Add 1 piece of the butter and cook, stirring constantly with the spatula to prevent scorching, until the butter is almost melted. Repeat with the remaining 9 pieces of butter. 

Continue to cook, stirring often until the curd has thickened and is beginning to bubble, about 1 minute longer. 

Strain the curd into the bowl and discard the zest and any bits of cooked egg. Cool for 15 minutes then place a sheet of plastic wrap directly on the surface of the curd (to prevent a skin from forming) and chill in the refrigerator until very cold, at least 4 hours.

The curd will keep, covered, in the refrigerator for a week or frozen for up to 3 months. Defrost in the refrigerator before serving.

Makes about 3 cups.


Vanilla Bean Meringues

  • 9 oz superfine sugar (about 1 cup plus 2 tablespoons)

  • 1 vanilla bean (I used a Tahitian vanilla bean since they are beautifully floral)

  • 1 1/2 tablespoons cornstarch

  • Pinch salt

  • 6 oz egg whites (from about 5 large eggs)--reserve the yolks for curd

  • 2 teaspoons white wine vinegar


Place a rack in the middle of the oven and preheat to 250° F. Line a rimmed sheet pan with parchment paper. 

Place the sugar in a small bowl. Split the vanilla bean lengthwise and scrape out the seeds with a paring knife. Add the vanilla seeds to the bowl with the sugar. Using your fingers, rub the seeds into the sugar; this will keep the vanilla from clumping together in the meringues. Add the cornstarch and salt. Whisk to combine and break up any clumps.

Using a stand mixer fitted with the whisk attachment, whip the egg whites at medium speed until soft peaks form, 2-3 minutes.

Increase the speed a little and slowly sprinkle in the sugar mixture. It should take you about a minute or more; adding the sugar too quickly or before the eggs form soft peaks will result in a less stable meringue that might spread or weep. A minute or so after all of the sugar mixture has been added, add the vinegar. Increase the speed to medium-high and continue to whip until the meringue forms very stiff peaks, 5-8 minutes longer. You will know the meringue is stiff enough when it will hold the whisk attachment perfectly upright with no other support.  

Spoon the meringue into 6 heaping mounds, each about 4 inches wide on the parchment-lined sheet pan (be sure they aren’t touching). If you want drier, crunchier meringues, use the back of a spoon to flatten each meringue a bit so they are thinner. If you like more marshmallowy meringues, leave them as fluffy mounds.

Bake the meringues until they are crisp and dry to the touch on the outside but still white (not golden or cracked), about 80-90 minutes for flat meringues and about 2 hours for thick ones. Check on the meringues periodically to make sure they aren’t coloring or cracking. If they are, rotate the sheet pan and reduce the oven temperature by 25 degrees.

When the meringues are done, turn off the oven and let the meringues cool completely in the oven. If you're not using them right away, store the cooled meringues in a tightly sealed container (I like a large mason jar). They will keep for a week or two, depending on how dry they are cooked, in a well-sealed container.

Makes 6 large meringues.


Grapefruit Olive Oil Cake
Adapted slightly from Yossy Arefi

  • 1 cup (200g) sugar

  • 1 3/4 cups (225g) all-purpose flour

  • 1 teaspoon baking powder

  • 1/2 teaspoon baking soda

  • 1/2 teaspoon salt

  • 3/4 cup (175ml) fruity olive oil

  • 1/4 cup (55g) unsalted butter, melted and cooled

  • 1 tablespoon finely grated grapefruit zest

  • 4 large eggs, at room temperature

  • 1 cup (240ml) whole-milk kefir or buttermilk, at room temperature (I used kefir)


Follow this recipe, omitting the rosemary and substituting 1 tablespoon finely grated grapefruit zest for the lemon zest.


orange-pistachio semolina cake

orange pistachio semolina cake || Image: Olaiya Land

Hello lovely people,

I’m back in Seattle after seven glorious weeks in Europe. And by glorious I mean crazy chaotic and jam-packed with work! I think I might be constitutionally incapable of being realistic about my own limitations. If a project sounds fun/interesting/novel/challenging, I feel compelled to say yes. Sleep and sanity be damned.

I’m not complaining. I got to discover beautiful Bordeaux. And collaborate with talented artists. And people-watch in Paris. And eat amazing food from my favorite chefs. And see friends. And make new ones. And drink a little too much deliciously funky French champagne. 

orange pistachio semolina cake || Image: Olaiya Land

But I landed in Seattle sort of flattened from all those weeks of living out of a suitcase and navigating the stress of travel abroad. (Not once, but twice, restaurants I had booked for my retreat guests lost our reservation. One for 12 people on a Saturday night during Paris fashion week!) 

So since I got home, I’ve tried to be extra kind to myself. I’ve been making space for ample amounts of sleep. (I actually just woke up from a long Friday afternoon nap, which is unheard of for me.) Plenty of water and nourishing food. Runs through the fall foliage. Lots of laughter and connection with friends and family. And just generally more pleasure. You know--all those things we know we should be doing but don’t.

orange pistachio semolina cake || Image: Olaiya Land

I have a mountain of images from my trip to sift through and I can’t wait to share them with you! But as part of taking my foot off the gas for a moment, I decided to opt for something a little easier this week. This superb cake was left over from a cooking class I taught at Book Larder. It wasn’t really on my agenda to shoot it and put it up on the blog. But then I woke up the day after my class and realized I had a delicious, fully-baked cake in my possession and that it would be pretty easy-peasy to shoot and share it.

Now don’t go thinking I’d throw any old junk up here on the blog; this cake is ridiculously good. I hadn’t made it in a couple of years and had forgotten how truly fantastic it is. When I cut myself a slice in class, topped it with a mound of delicately floral orange blossom whipped cream and took a bite, I was momentarily transported.

orange pistachio semolina cake || Image: Olaiya Land

In line with this week’s theme of keeping things easy, this cake comes together with very little fuss. No egg whites to whip up. No need to remember to bring your ingredients to room temperature. You don’t even need a mixer. So if you also want to be extra nice to yourself this weekend, this cake is for you!

I’ll be back soon to share new work from my Paris and Portugal trips with you. In the meantime, I’ll be spending my weekend cooking, listening to records, watching the rain come down, and hopefully fitting in a nap or two.


Orange-Pistachio Semolina Cake

  • 2 cups sugar, divided
  • 1/2 cup water
  • 1 cinnamon stick
  • Kosher salt
  • 3 tablespoons freshly-squeezed orange juice (zest the orange before juicing and reserve zest)
  • 3/4 cup shelled pistachios
  • 1 cup sugar
  • 1/2 cup all-purpose flour
  • 1 1/4 teaspoon baking powder
  • 2 cups fine semolina
  • 1 1/4 cup whole milk
  • 1/2 cup (8 tablespoons) butter

To serve

  • 1 recipe Orange Blossom Whipped Cream (below)

  • ¼ cup roughly chopped pistachios


*Note: This cake is better the next day, so make it in advance if you have time. Leave it covered out of the refrigerator overnight. 

orange pistachio semolina cake || Image: Olaiya Land

Preheat the oven to 350F. In a small saucepan, combine 1 cup of the sugar, water, cinnamon stick and a small pinch of salt. Bring to a simmer over medium heat and cook at a bare simmer, stirring occasionally, until the sugar has dissolved and the syrup has thickened slightly, 5-6 minutes minutes. Remove from the heat, stir in the orange juice. Set aside to cool until the cake is done.

Butter an  8” x 8” square or 9” round cake pan. 

Combine the pistachios and sugar in a blender or food processor. Process into a fine powder. Sift the pistachio sugar, flour, baking powder, 1/4 teaspoon salt and semolina into a large bowl. (The pistachios won't fit through a fine-mesh sieve, so if you don't have a medium-mesh sieve, use a fork or whisk to aerate your ingredients and remove lumps.) Add 1 teaspoon of the reserved orange zest and whisk to combine. Use your fingers to break up any remaining lumps.

Melt the butter in a small saucepan then transfer to a medium bowl. Heat the milk in the same pan over medium-low heat until it feels warm to the touch. Add to the bowl with the butter and whisk to combine. Add the milk and butter to the semolina mixture and stir to combine, making sure there are no pockets of dry semolina at the bottom of the bowl. 

Pour the batter (it will be thick) into the prepared baking dish. Bake for 40-45 minutes, until a toothpick inserted in the center comes out clean. 
 
When the cake is done, remove the cinnamon stick from the syrup. Pour the cooled syrup over the hot cake. Let the cake sit until the liquid has been fully absorbed and the cake has cooled to room temperature. Cut the cake into roughly 3-inch squares or diamonds. Top slices with Orange Blossom Whipped Cream and sprinkle with chopped pistachios before serving. 

Makes 8-10 servings.


Orange Blossom Whipped Cream 

  • 1 cup cold heavy cream

  • 2 teaspoons sugar (preferably superfine), or to taste

  • 1-2 tablespoon orange blossom water


Place the cream, sugar and 1 tablespoon of the orange blossom water into the bowl of an electric mixer fitted with the whisk attachment and beat on medium-high speed until the sugar has mostly dissolved. (You can also whip the cream with a hand blender or by hand with a whisk.) Taste and add more orange blossom water and/or sugar if desired. Beat until soft peaks form and serve.

Makes about 2 cups.

orange pistachio semolina cake || Image: Olaiya Land